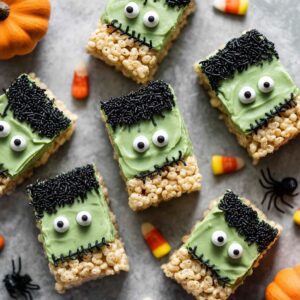
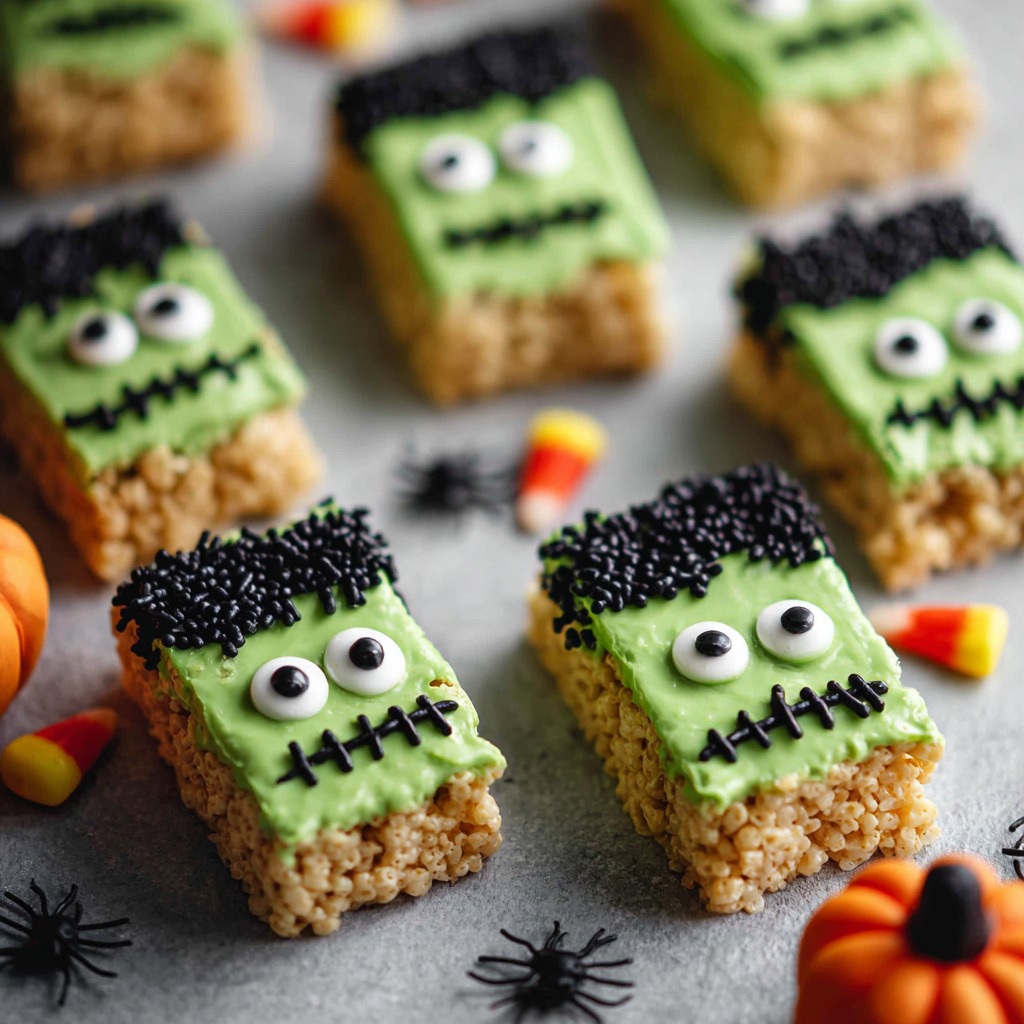
Thank you so much for being here! I’m absolutely thrilled to share one of my favorite Halloween-inspired treats with you—Frankenstein Rice Krispie Treats. These little green monsters are more than just adorable; they’re also ridiculously easy to make, kid-friendly, no-bake, and totally delicious. Whether you’re whipping them up for a classroom party, a spooky movie night, or just for fun with the kids, these treats deliver both festive charm and serious marshmallowy crunch!
Frankenstein Rice Krispie Treats are the kind of recipe that makes you look like a Pinterest wizard—with almost zero effort. Ready to get your spooky snack on? Subscribe to get this recipe straight to your inbox and never miss another holiday hit!
What Are Frankenstein Rice Krispie Treats?
Frankenstein Rice Krispie Treats are a Halloween-themed twist on the classic marshmallow and cereal bars. They’re tinted green with food coloring, cut into rectangles (to resemble Frankenstein’s head), and decorated with candy eyes, melted chocolate “hair,” and icing details to bring the spooky creature to life.
They’re no-bake, made with just a few pantry staples, and can be prepped in under 30 minutes. Perfect for last-minute party prep!
Why You’ll Love This Recipe

Kid-approved: Kids love both making and eating these spooky snacks.
No oven needed: Minimal mess, minimal time—yes, please!
Festive and fun: These are practically made for Halloween parties.
Customizable: You can play with the design to make them as spooky or silly as you like.
What Do Frankenstein Rice Krispie Treats Taste Like?
Imagine biting into a soft, gooey, slightly crispy square loaded with marshmallow sweetness and that nostalgic cereal crunch—now dressed up with a layer of chocolate and a few candy bits. They taste like the classic Rice Krispie treat you already love, with just a little extra holiday magic.
Benefits of These Treats
Fun family activity: Decorating these little Frankensteins is a blast.
Allergen-friendly: Naturally nut-free and can be made gluten-free.
Make-ahead friendly: They store well for several days.
Crowd-pleaser: Whether you’re 4 or 40, these treats are irresistible.
Ingredients
Here’s what you’ll need to bring these spooky treats to life:
6 cups Rice Krispies cereal
1 (10 oz) bag mini marshmallows
3 tablespoons unsalted butter
Green gel food coloring
Candy eyeballs
Semi-sweet chocolate chips or black candy melts (for hair)
Black decorating gel or icing (for scars and mouth)
Optional: mini marshmallows or chocolate chips for Frankenstein “bolts”
Tools You’ll Need
Large pot or microwave-safe bowl
Spatula (greased or silicone)
9×13 inch baking dish
Parchment paper
Sharp knife
Small piping bag or zip-top bag for decorating
Microwave or double boiler (for melting chocolate)
Additions and Substitutions
Cereal: Swap Rice Krispies with cocoa-flavored cereal for a chocolatey twist.
Vegan-friendly: Use vegan marshmallows and plant-based butter.
Candy melts: Substitute regular chocolate with green or purple candy melts for fun accents.
Eyeballs: No candy eyes? Use mini M&Ms or pipe your own with royal icing!
How to Make Frankenstein Rice Krispie Treats
Step 1: Prepare Your Pan
Line a 9×13-inch baking dish with parchment paper and lightly grease it. This makes removing the treats super easy!
Step 2: Make the Base
In a large pot over low heat, melt the butter. Add marshmallows and stir until completely melted and smooth. Remove from heat and stir in a few drops of green food coloring until you reach your desired Frankenstein shade.
Step 3: Add the Cereal
Stir in the Rice Krispies cereal, mixing until everything is fully coated. Press the mixture into your prepared pan, smoothing the top with a greased spatula or wax paper. Let cool for about 20 minutes.
Step 4: Cut Into Rectangles
Once set, lift the mixture from the pan and cut it into even rectangles—these will be Frankenstein’s heads!
Step 5: Decorate
Melt the chocolate chips or candy melts and dip the tops of each rectangle to create “hair.” Immediately add candy eyeballs before the chocolate sets. Use the black decorating gel to draw a mouth and a stitch or scar on the forehead. Add bolts to the sides using mini marshmallows or chocolate chips, if desired.
Step 6: Let Set and Serve
Allow everything to set for about 15–20 minutes or until the chocolate hardens. Then serve and enjoy the smiles!
What to Serve with Frankenstein Rice Krispie Treats
These make the perfect centerpiece for a Halloween dessert table! Serve alongside:
Halloween punch or apple cider
Candy corn or mini chocolate bars
Mummy hot dogs or spooky deviled eggs for a full party spread
Pumpkin cookies or ghost cupcakes for a sweet variety
Tips for Perfect Frankenstein Treats
Grease your spatula: This prevents sticky messes when pressing the cereal mixture.
Use gel food coloring: It gives a bolder color without watering down the mix.
Work quickly: Rice Krispie treats firm up fast—have everything ready before you start.
Cool before decorating: Warm treats can melt your chocolate and icing details.
Storage Instructions
Store your Frankenstein Rice Krispie Treats in an airtight container at room temperature for up to 4 days. If you need to stack them, place a piece of parchment between layers to avoid smudging the decorations.
Avoid refrigerating, as that can make them hard and chewy.
General Information
Servings: Makes about 12–15 treats depending on how you cut them
Prep time: 15 minutes
Cooling/Decorating time: 30 minutes
Skill level: Beginner
Best for: Halloween parties, class treats, fall festivals
Frequently Asked Questions

Can I make these ahead of time?
Absolutely! These treats can be made 1–2 days in advance and still taste great.
How do I get the color just right?
Start with a few drops of gel food coloring and add more as needed. Remember, the color deepens slightly as it cools.
Can I use store-bought Rice Krispie treats?
Yes! Buy a box, cut them to size, and just decorate if you’re short on time.
Are they gluten-free?
Rice Krispies cereal is not gluten-free due to malt flavoring, but you can substitute with a certified gluten-free crispy rice cereal.
What if I don’t have candy eyeballs?
Get creative! Mini M&Ms, chocolate chips, or hand-piped icing dots can work in a pinch.
Conclusion
Frankenstein Rice Krispie Treats are festive, fun, and practically foolproof. They’re the kind of project that brings people together in the kitchen and earns rave reviews at any Halloween gathering. Plus, they’re adorable and delicious—what more could you want?
Looking for more fall treats featuring spooky or seasonal flair? Try out these:
Pumpkin Snickerdoodle Cookies
Monster Brownies
Candy Corn Fudge
Apple Pie Rice Krispie Treats
And if you make these Frankenstein cuties, I’d love to see them! Please leave a review and don’t forget to tag your photos on Pinterest so I can admire your spooky creations!
Nutritional Information (per treat, approx.)
Calories: 180
Fat: 5g
Carbs: 33g
Sugar: 18g
Protein: 1g
Fiber: 0g
(Keep in mind nutritional values may vary based on brands and portion sizes.)
Happy haunting and happy snacking! 🎃

