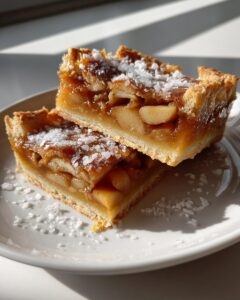
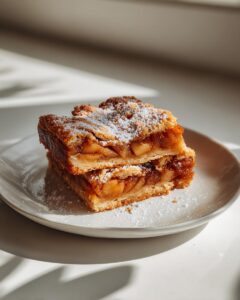
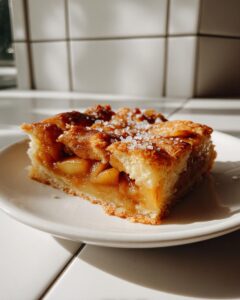
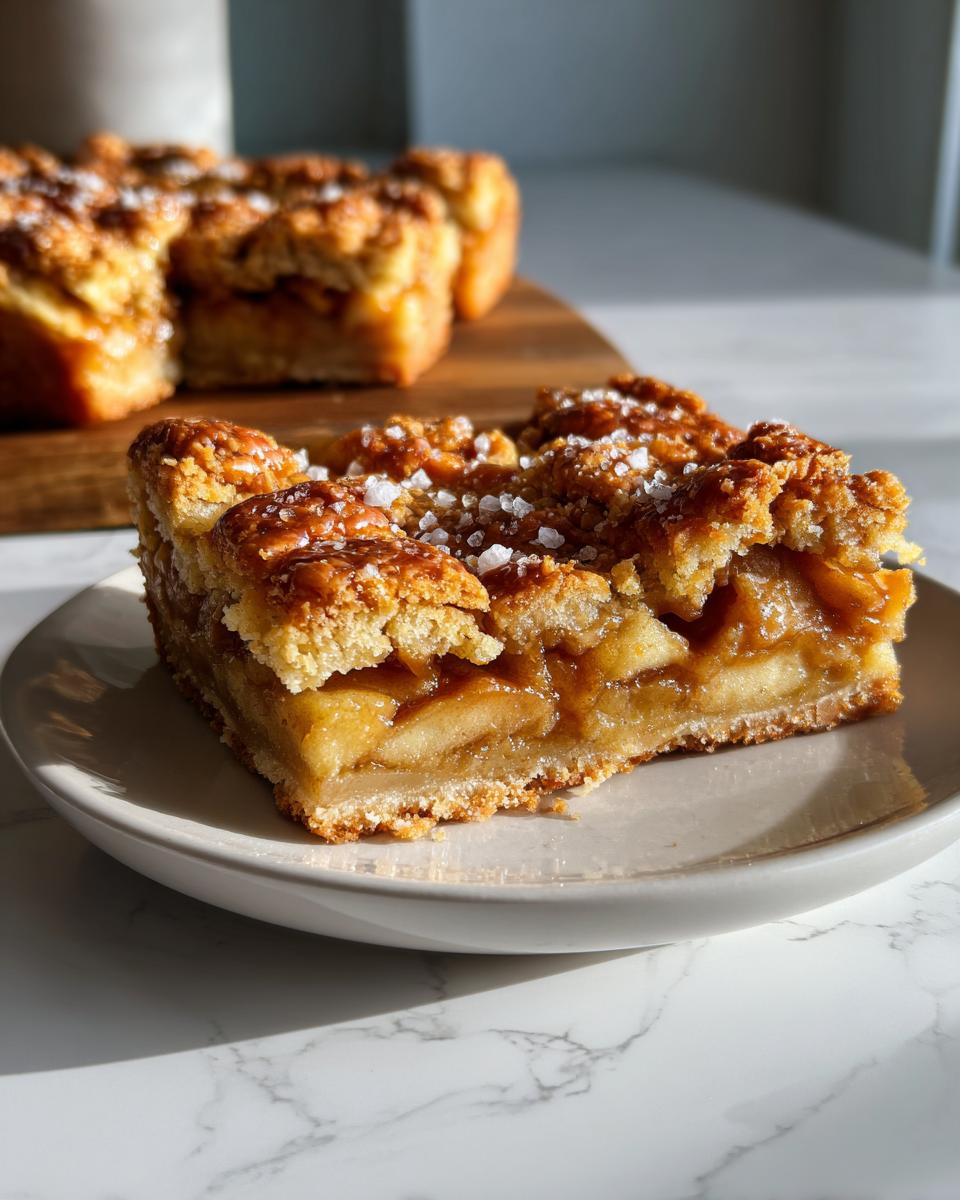
Nothing says fall like the scent of cinnamon and apples baking in the oven, and these irresistible salted caramel apple bars capture that cozy feeling perfectly. I first made them for a Halloween party last year, and let me tell you – they disappeared faster than the kids’ candy haul! What makes these bars so special is that magical balance of sweet, tart apples with rich caramel and just a kiss of sea salt that makes your taste buds dance.
I’ll never forget my neighbor’s face when she took her first bite – eyes wide, then closing slowly with that “oh wow” expression we all know means a recipe’s a keeper. That buttery crust, those tender spiced apples, and that gooey caramel topping with salty flakes… it’s autumn in every bite. Whether you’re hosting friends or just treating yourself with a cup of tea, these bars turn any ordinary day into a fall celebration.
Why You’ll Love These Salted Caramel Apple Bars

Listen, I know you’ve got a million dessert recipes pinned, but trust me – these salted caramel apple bars deserve a permanent spot in your fall baking rotation. Why? Let me count the ways:
Perfect for Fall Gatherings
These bars are like the social butterfly of desserts – they make friends everywhere they go! I’ve brought them to everything from Thanksgiving potlucks to casual Sunday football watch parties, and they always steal the show. The combination of warm spices and gooey caramel just screams “autumn celebration.” Plus, they travel like champs – no messy slices sliding around your platter!
Easy to Make
Here’s the best part: they’re ridiculously simple. No fancy pastry skills required – just toss, press, and bake. The crust comes together in minutes (no rolling pin needed!), and the apple filling barely needs prep. Even my baking-challenged cousin can make these without panic-texting me for help. If you can peel an apple and stir ingredients, you’re golden.
Seriously, whether you’re a seasoned baker or someone who usually burns toast, these bars will make you look like a kitchen rockstar. And that salted caramel drizzle? Pure magic with minimal effort.
Ingredients for Irresistible Salted Caramel Apple Bars
Alright, let’s talk ingredients – and I mean the good stuff that makes these bars sing with fall flavors. I’ll be honest, the quality of your ingredients makes all the difference here. No fancy-schmancy items, just simple, honest baking staples that come together in the most magical way.
The Crust (Our Flaky Foundation)
- 2 cups all-purpose flour (spooned and leveled, please – no packing!)
- 1/2 cup granulated sugar (the regular white stuff works perfectly)
- 1/2 teaspoon salt (I use kosher, but table salt’s fine in a pinch)
- 1 cup unsalted butter (cold and cubed – I pop mine in the freezer for 10 minutes before starting)
The Apple Filling (Where the Magic Happens)
- 3 medium apples (peeled and diced – Granny Smith are my go-to for that perfect tartness)
- 1/4 cup brown sugar (packed tight – none of this loosey-goosey measuring)
- 1 teaspoon cinnamon (the more fragrant, the better)
The Grand Finale
- 1/2 cup caramel sauce (store-bought is fine, but homemade is next-level)
- 1/2 teaspoon flaky sea salt (Maldon makes those pretty little pyramids, but any flaky salt works)
See? Nothing crazy – just straightforward ingredients you probably have on hand already. Now let me tell you why these specific items matter – that cold butter creates the flakiest crust, those tart apples balance the sweet caramel perfectly, and that flaky salt? Oh honey, it’s the secret weapon that takes these from good to “can I have the whole pan?”
How to Make Irresistible Salted Caramel Apple Bars

Okay, friends – time to roll up our sleeves and make some magic happen! Don’t let the layers fool you – these bars come together easier than you think. I’ll walk you through each step like I’m right there in your kitchen (wearing my favorite flour-dusted apron, of course).
Preparing the Crust
First things first – preheat that oven to 350°F (175°C). While it’s warming up, grab your biggest mixing bowl and whisk together the flour, granulated sugar, and salt. Now here comes the fun part – time to work in that cold butter. I use my hands (clean, obviously!) to squish the butter cubes into the flour mixture until it looks like coarse crumbs. You’ll know it’s ready when you can squeeze a handful and it sort of holds together.
Next, press about half of this mixture firmly into your greased 9×9-inch pan. I mean business here – really pack it down with your fingers or the bottom of a measuring cup. Pop it in the oven for 15 minutes until it’s just starting to turn golden at the edges. That smell? That’s the sound of success wafting through your kitchen.
Assembling the Apple Layer
While the crust bakes, let’s tackle those apples. Peeled and diced is the way to go – you want nice little chunks, not mush. Toss them in a bowl with the brown sugar and cinnamon until they’re all coated and smelling like autumn heaven. Pro tip: Let this mixture sit for about 5 minutes – the sugar will draw out some of the apple juices, creating this amazing syrup that’ll bubble up beautifully in the oven.
When the crust comes out, spread your sugared apples evenly over it. Don’t be shy – pile ’em high! Then drizzle about half of your caramel sauce over the apples. I like to zigzag it so every bite gets some gooey goodness.
Baking and Finishing Touches
Sprinkle the remaining crust mixture over the apples – no need to press this time, just let it fall where it may for that rustic look. Back in the oven it goes for 25-30 minutes, until the top is golden and you can see caramel bubbles peeking through here and there.
Here’s where the magic happens: Pull it out and immediately drizzle the remaining caramel over the top, then sprinkle with that beautiful flaky sea salt. Resist the urge to cut in right away (I know, it’s hard!) – let it cool completely so the caramel can set. Trust me, the wait is worth it when you get those perfect, clean slices.
Tips for Perfect Irresistible Salted Caramel Apple Bars
After baking countless batches (and taste-testing every single one – tough job!), I’ve learned some foolproof tricks:
- Apple smarts: Granny Smiths are my MVP – their tartness balances the sweet caramel perfectly.
- Caramel control: Warm your sauce slightly for easy drizzling, but not too hot or it’ll make everything soggy.
- Salt timing: Sprinkle that flaky sea salt while the bars are still warm so it sticks beautifully.
- Patience pays: Wait until they’re completely cool before cutting – I promise the clean slices are worth it!
- Storage secret: Keep leftovers in an airtight container with parchment between layers. They’ll stay fresh for 3 days… if they last that long!
Variations for Irresistible Salted Caramel Apple Bars
One of the best things about this recipe? It’s like a blank canvas waiting for your personal touch! Over the years, I’ve played around with all sorts of delicious twists – here are my favorites that still keep that irresistible salted caramel apple magic:
Nutty Delights
For some extra crunch, try mixing 1/2 cup chopped pecans or walnuts into the crumb topping. Toasting them first brings out their flavor even more. My Uncle Joe insists the pecan version is the only way to go – he says the nuttiness pairs perfectly with the caramel. (Pssst… he’s not wrong.)
Apple Mixology
While Granny Smiths are classic, mixing apple varieties creates amazing depth. Try half Granny Smith and half Honeycrisp for that perfect sweet-tart balance. Last fall, I used Pink Lady apples and oh my – the floral notes took these bars to a whole new level!
Spice It Up
Feeling adventurous? Add 1/4 teaspoon cardamom or allspice to the cinnamon for a warm, complex flavor. My Halloween batch had a pinch of cayenne pepper in the caramel – just enough to make you go “Hmm, what’s that delicious tingle?” without being spicy.
The beauty is that no matter which route you take, that buttery crust and salted caramel will still shine. So go wild – baking should be fun! Just maybe write down what you did… because when these variations turn out amazing (and they will), you’ll want to recreate them exactly next time.
Serving and Storing Irresistible Salted Caramel Apple Bars

Now comes the best part – enjoying your masterpiece! These bars are pure magic when served slightly warm, so if you’ve resisted digging in right away (kudos to your willpower!), just pop a square in the microwave for about 15 seconds before serving. The caramel gets all gooey again, and the cinnamon scent will have everyone crowding the kitchen. I love serving mine with a scoop of vanilla ice cream for that classic “à la mode” moment – the cold creaminess against the warm spiced apples is absolute heaven.
For storage, here’s what I’ve learned from many batches (and many happy taste-testers): First, let the bars cool completely before covering – trapping heat leads to soggy bottoms, and nobody wants that. I store mine in an airtight container with parchment paper between layers if stacking. They’ll keep beautifully at room temperature for about 2 days, or up to 5 days in the fridge (though they rarely last that long in my house!).
Pro tip: If you’ve refrigerated them, I highly recommend that quick microwave warm-up before serving to bring back that fresh-from-the-oven texture. And if you’re feeling fancy, a fresh drizzle of caramel and tiny sprinkle of sea salt right before serving makes them look bakery-perfect. These bars also freeze surprisingly well – just wrap individual portions tightly in plastic wrap and foil, then thaw at room temperature when the craving hits. Perfect for those days when you need a little fall comfort in a hurry!
Nutritional Information
Okay, let’s talk numbers – but don’t let this scare you off! One of these glorious salted caramel apple bars comes in at about 280 calories, making it the perfect little indulgence. Here’s the full breakdown per serving (because knowledge is power, right?):
- Calories: 280
- Sugar: 22g (mostly from those beautiful apples and caramel – nature’s candy!)
- Sodium: 180mg (that flaky sea salt adds just the right touch)
- Fat: 14g (thank that glorious butter for the flaky crust)
- Carbohydrates: 36g (hello, energy boost!)
- Fiber: 2g (apples for the win!)
- Protein: 2g (not why we’re here, but hey, it’s something)
Now, full disclosure – these numbers can vary based on your specific ingredients. Did you go heavy on the caramel drizzle? (No judgment – I do too!) Used a different apple variety? Your mileage may vary. But honestly, when you’re biting into that perfect balance of sweet, salty, and buttery, does it really matter? Everything in moderation, friends – including moderation itself!
Frequently Asked Questions
Over the years, I’ve gotten all sorts of questions about these salted caramel apple bars – and I love helping bakers get them just right! Here are the most common ones with my tried-and-true answers:
Can I use store-bought caramel sauce?
Absolutely! While homemade caramel is divine, I won’t judge if you grab a jar from the store – I’ve done it plenty of times when I’m short on time. Just look for a good-quality sauce that’s thick enough to drizzle. My secret? Warm it slightly before using so it flows beautifully over those apples.
What if I don’t have Granny Smith apples?
No worries – any firm, tart apple works great. Honeycrisp, Braeburn, or even Pink Lady apples make delicious substitutes. The key is avoiding super soft varieties like Red Delicious that turn to mush. My neighbor once used Fuji apples in a pinch, and they turned out surprisingly good!
Can I make these bars ahead of time?
You bet! These bars actually taste better the next day as the flavors meld. Bake them up to 24 hours in advance, let them cool completely, then store at room temperature in an airtight container. Pro tip: Wait to add that final drizzle of caramel and sprinkle of salt until just before serving for maximum wow factor.
Help! My crust seems too crumbly – what did I do wrong?
Oh honey, we’ve all been there! Usually it means you needed to press the base layer more firmly into the pan. Next time, really pack it down with the bottom of a measuring cup. Also, make sure your butter was properly cold – if it was too soft, the crust won’t hold together as well.
Can I freeze these apple bars?
Absolutely! They freeze like a dream. Just cut them first, then wrap individual bars tightly in plastic wrap and foil. They’ll keep for up to 3 months. When the craving hits, thaw at room temperature for about an hour or pop them in the microwave for 20 seconds. Good as fresh – maybe even better when you need that instant fall comfort!
Ready to Bake?
Well, my baking friend, you’ve got all my secrets now! I can’t wait for you to experience that magical moment when these bars come out of the oven – your kitchen smelling like a Expertise Cider Mill and that first bite of warm, gooey perfection. Trust me, once you make these, you’ll understand why my neighbors keep “accidentally” dropping by around baking time Syllabus!
I’d love to hear how your salted caramel apple bars turn out! Snap a photo of your masterpiece and tag me – there’s nothing I love more than seeing your baking wins. And七年Pro tip: make a double batch. The first tray always disappears faster than you can say意味着 “autumn harvest.” Now go preheat that oven and get ready for some serious compliments – your new signature dessert awaits! Happy baking!</也与</YPEffect
Print
Irresistible Salted Caramel Apple Bars in 3 Easy Steps
- Total Time: 60 minutes
- Yield: 12 bars 1x
- Diet: Vegetarian
Description
These salted caramel apple bars are perfect for fall. They combine sweet apples, rich caramel, and a buttery crust for a delicious treat.
Ingredients
- 2 cups all-purpose flour
- 1/2 cup granulated sugar
- 1/2 tsp salt
- 1 cup unsalted butter, cold and cubed
- 3 medium apples, peeled and diced
- 1/4 cup brown sugar
- 1 tsp cinnamon
- 1/2 cup caramel sauce
- 1/2 tsp sea salt
Instructions
- Preheat oven to 350°F (175°C).
- Mix flour, granulated sugar, and salt in a bowl.
- Cut in butter until the mixture resembles coarse crumbs.
- Press half the mixture into a greased 9×9-inch baking pan.
- Bake for 15 minutes.
- Toss apples with brown sugar and cinnamon.
- Spread apples over the baked crust.
- Drizzle caramel sauce on top.
- Sprinkle remaining crust mixture over the apples.
- Bake for 25-30 minutes.
- Sprinkle with sea salt while warm.
- Let cool before cutting into bars.
Notes
- Use tart apples like Granny Smith for best results.
- Store in an airtight container for up to 3 days.
- Warm slightly before serving for extra gooey caramel.
- Prep Time: 20 minutes
- Cook Time: 40 minutes
- Category: Dessert
- Method: Baking
- Cuisine: American
Nutrition
- Serving Size: 1 bar
- Calories: 280
- Sugar: 22g
- Sodium: 180mg
- Fat: 14g
- Saturated Fat: 9g
- Unsaturated Fat: 4g
- Trans Fat: 0g
- Carbohydrates: 36g
- Fiber: 2g
- Protein: 2g
- Cholesterol: 35mg
Keywords: apple bars, salted caramel, fall dessert, easy baking

