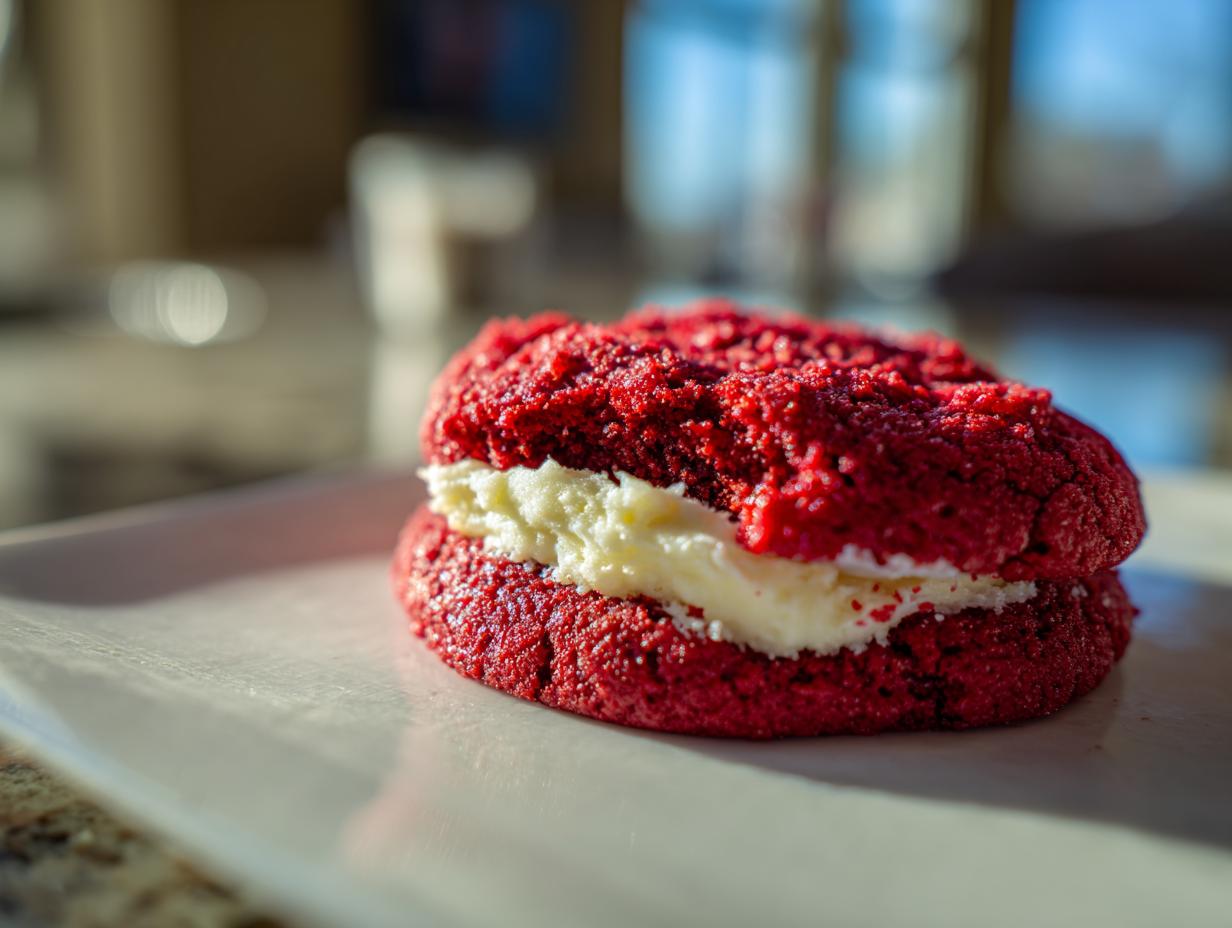
Oh, red velvet! Just hearing the words makes me think of something special, doesn’t it? It’s that perfect mix of chocolatey, tangy, and decadent, all wrapped up in that gorgeous, festive red color. And when you turn it into cookies, magic happens! These Red Velvet Cookies are seriously my go-to when I want something that tastes like a hug and looks like a party in your mouth. Forget those dry, crumbly versions; these are wonderfully soft, have just the right amount of cocoa and tang, and that creamy cream cheese frosting? Pure bliss. I remember my grandma making something similar for holidays, and the aroma filling her kitchen was just… heavenly. These cookies capture that same spirit.
Why You’ll Love These Red Velvet Cookies
These cookies are just a dream, for real! Here’s why you’ll be making them again and again:
- That Classic Red Velvet Flavor: It’s got that perfect balance of rich chocolate and a hint of tang, just like you’d expect from your favorite red velvet cake, but in a chewy cookie!
- Super Easy to Make: Honestly, these are surprisingly simple. You don’t need fancy techniques, just a little bit of mixing and baking magic.
- Incredible Texture: They’re soft and chewy in the middle with just slightly set edges – perfection!
- Festive and Fun: That beautiful red color just screams celebration! They’re perfect for holidays, birthdays, or just because you want a little brightness in your day.
- Heavenly Cream Cheese Frosting: The tangy, sweet frosting is the absolute cherry on top – it makes them truly irresistible.
Gather Your Ingredients for Perfect Red Velvet Cookies
Alright, let’s get our ingredients ready! The secret to these amazing red velvet cookies is using good quality stuff and having it all prepped. Trust me, it makes the whole process way smoother. You’ll need these for the cookies themselves:
For the Red Velvet Cookies:
- 2 1/4 cups all-purpose flour
- 1 teaspoon baking soda
- 1/2 teaspoon salt
- 1/2 cup (that’s 1 stick) unsalted butter, make sure it’s softened – not melted, just nice and soft!
- 1 cup granulated sugar
- 1 large egg, at room temperature, please!
- 1 teaspoon vanilla extract
- 1 tablespoon unsweetened cocoa powder
- 1 ounce unsweetened chocolate, melted (just pop it in the microwave for a few seconds!)
- 1/4 cup buttermilk – this gives it that signature tang!
- And for that vibrant color, 1-2 drops of red food coloring. You don’t need much!
And of course, for that dreamy topping:
For the Cream Cheese Frosting:
- 4 ounces cream cheese, also softened. Cold cream cheese is not our friend here!
- 1/4 cup (that’s half a stick) unsalted butter, also softened.
- 1 teaspoon vanilla extract
- 2 cups powdered sugar, so get that sifter ready!
Step-by-Step Guide to Making Red Velvet Cookies
Alright, let’s get down to business! Making these Red Velvet Cookies is super straightforward, and honestly, part of the fun is mixing everything together to see that gorgeous color bloom. Just follow these steps, and you’ll be pulling out perfect cookies in no time.
Preparing the Cookie Dough for Red Velvet Cookies
First things first, get that oven preheating to 350°F (175°C), and line a couple of baking sheets with parchment paper. This stops any sticking, a total lifesaver! In a medium bowl, just whisk together your flour, baking soda, and salt. Set that aside. Now, in a big bowl, cream together your softened butter and sugar until it looks light and fluffy. It’s like magic happening right before your eyes! Then, beat in that egg and the vanilla extract. For the red velvet magic, grab a tiny bowl and mix your cocoa powder with the melted unsweetened chocolate. Stir in the buttermilk, add just a drop or two of red food coloring (it really packs a punch!), and whisk that chocolate mixture along with it. Now, add your dry ingredients to the wet ingredients, but do it gradually, just mixing until it’s *just* combined. Don’t overmix, or your cookies might get tough!
Baking Your Delicious Red Velvet Cookies
Once your dough is ready, it’s time to scoop! Use a rounded tablespoon for each cookie and drop them onto those prepared baking sheets, leaving about 2 inches between them. They do spread a bit, so give them room to do their thing. Pop them into your preheated oven and bake for about 9 to 11 minutes. You’re looking for the edges to be set, but the centers should still look a little soft. They’ll firm up as they cool! Let them hang out on the hot baking sheets for a few minutes – this is important for them to set up just right – before carefully transferring them to a wire rack to cool completely. Seriously, wait until they’re totally cool before frosting, or you’ll have a melty mess!
Crafting the Cream Cheese Frosting
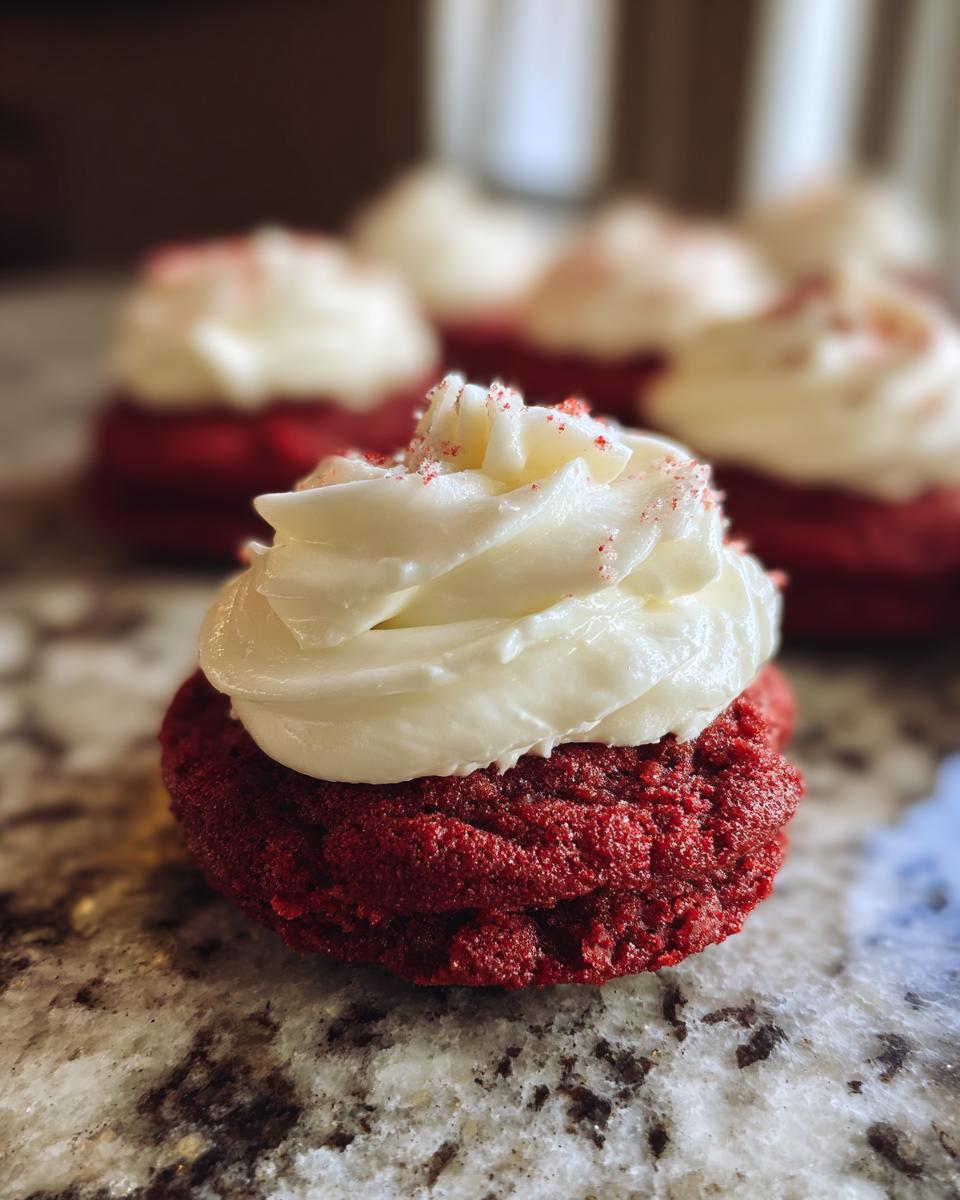
While those cookies are cooling off, let’s whip up the frosting! In a bowl, beat together your softened cream cheese and softened butter until they’re super smooth and creamy. You don’t want any lumps! Stir in that teaspoon of vanilla extract. Now, gradually add your powdered sugar. Start slow so it doesn’t fly everywhere, and keep beating until it’s all combined and luxuriously smooth. If it seems a little too thick, you can add a tiny splash more milk; if it’s too thin, just add a bit more powdered sugar. For a super helpful guide, check out our how to make cream cheese frosting tutorial!

Assembling Your Perfect Red Velvet Cookies
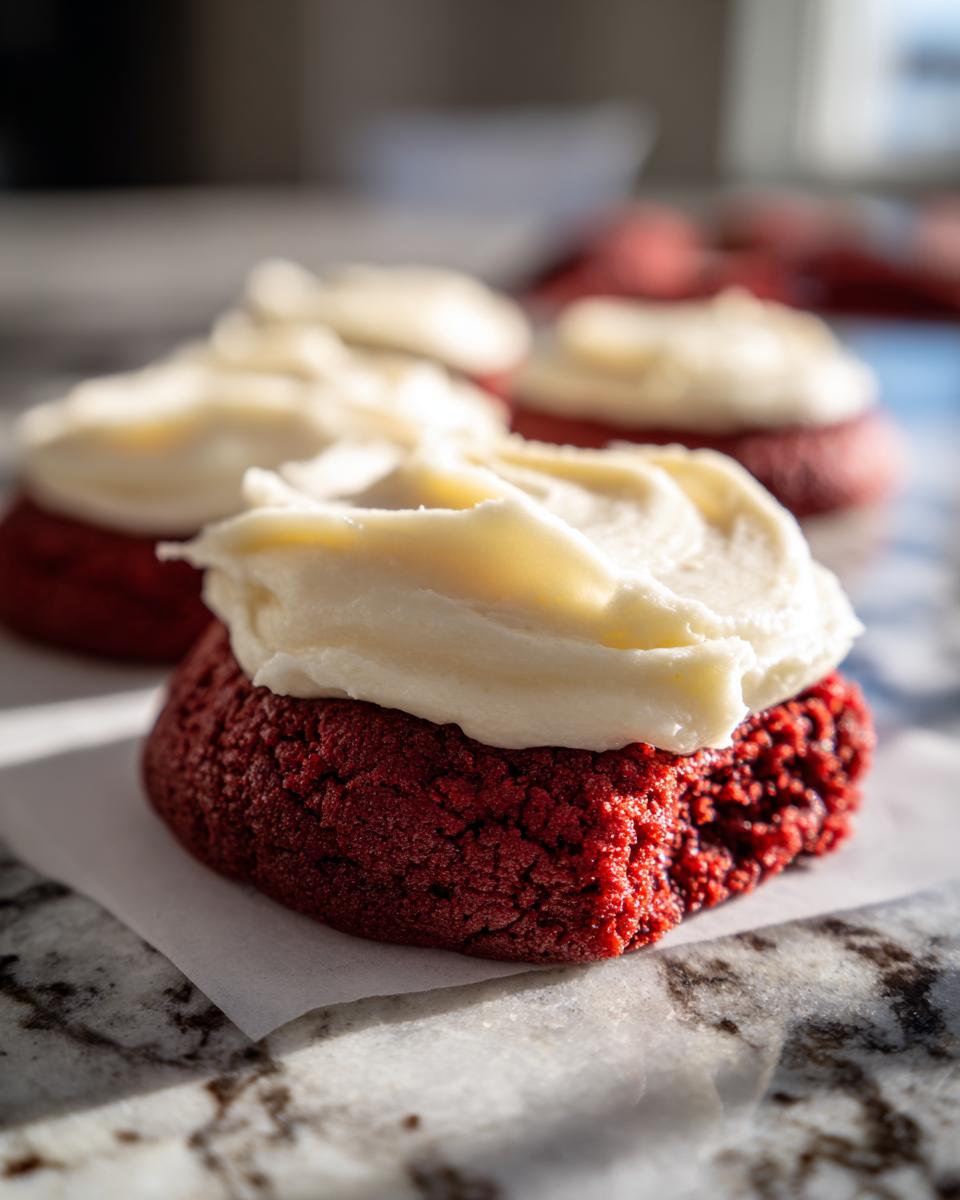
The grand finale! Once your cookies are completely cool – and I mean *cool*, not even warm – it’s time to frost. You can use a butter knife, a small offset spatula, or even a piping bag if you’re feeling fancy. Just spread a generous dollop of that dreamy cream cheese frosting on top of each cookie. Admire your handiwork, because these look almost too good to eat!

Tips for Baking the Best Red Velvet Cookies
Want to make sure your Red Velvet Cookies are absolutely perfect *every single time*? I’ve learned a few things over the years, and I’m happy to share them with you! These little tricks make a big difference.
- Room Temp is Key: Seriously, don’t skip softening your butter *and* your cream cheese. Cold ingredients just won’t cream together properly, and that’s where a lot of the cookie’s lovely texture comes from. Same goes for the egg!
- Don’t Overmix: I say it again because it’s so important for cookies! Once you add the flour, just mix until *barely* combined. Overmixing develops the gluten too much, and you’ll end up with tough cookies instead of chewy ones.
- Watch the Color: That beautiful red color is iconic, right? Don’t go crazy with the food coloring, though! Start with just 1-2 drops. Sometimes, the batter looks lighter when it’s raw than it does when baked. A little bit goes a long way for that perfect hue. If you *really* want a vivid color, a gel food coloring works wonders and you use less!
- Cool Completely Before Frosting: I know, I know, it’s tempting to frost them the second they come out of the oven. But trust me, let them cool 100% on a wire rack. Otherwise, that glorious cream cheese frosting will just melt into a sad puddle. Patience is a virtue here!
Ingredient Notes and Substitutions for Red Velvet Cookies
Sometimes you might be missing an ingredient or just want to try something a little different with your Red Velvet Cookies, and that’s totally okay! Let’s talk about a couple of things that might pop up.
That buttermilk? It’s what gives these cookies that little tang and helps with the texture, but if you don’t have any, no sweat! Just take 1/4 cup of regular milk and stir in 1/2 teaspoon of white vinegar or lemon juice. Let it sit for about 5 minutes, and boom – you’ve got a perfect buttermilk substitute. It’ll look a little curdled, but that’s exactly what you want!
As for the food coloring, using a gel food coloring instead of the liquid kind can give you an even more intense red color without making the dough too watery. You only need a tiny bit! If you’re looking for ingredient substitutions for other things, like making these gluten-free, you can usually swap out the all-purpose flour for a good quality 1:1 gluten-free baking flour blend. Just make sure it contains xanthan gum!
Frequently Asked Questions About Red Velvet Cookies
Got questions about whipping up these gorgeous Red Velvet Cookies? I’ve got answers! Baking should be fun, not fussy, so let’s clear up any little things you might be wondering about.
Can I make these Red Velvet Cookies without food coloring?
You totally can! The red color is iconic for red velvet, but if you’re avoiding food coloring, these cookies will still be absolutely delicious. They’ll just have a lovely chocolatey-cocoa flavor and a softer, brown hue like a great chocolate cookie. The taste will be just as amazing, promise!
How should I store my frosted Red Velvet Cookies?
Since these have that yummy cream cheese frosting, they need a little special care. It’s best to store them in an airtight container in the refrigerator. They’ll keep well for about 3-4 days. Just let them sit out for about 15-20 minutes before enjoying if they’ve been chilled!
Why are my Red Velvet Cookies flat and spread out?
Oh, that can happen sometimes! Usually, it’s because the butter was too soft or even melted when you creamed it with the sugar. Make sure your butter is just softened – like, if you press it, your finger leaves an indent, but it’s not greasy or mushy. Also, be careful not to overmix the dough once the flour is in; that can lead to spreading too!
Can I use other types of frosting on these cookies?
Absolutely! While the cream cheese frosting is classic and pairs SO well with that red velvet flavor, feel free to get creative. A simple vanilla buttercream would be lovely, or even a chocolate ganache if you’re feeling extra decadent. Just make sure the cookies are completely cool before you put any frosting on them!
Storage and Reheating Instructions
Storing these delicious Red Velvet Cookies properly is key to keeping them tasting their best. Because they have that luscious cream cheese frosting, it’s best to pop them into an airtight container and keep them in the refrigerator. They should stay lovely for about 3 to 4 days. If you prefer them not to be so chilled, just take them out about 15-20 minutes before you plan to gobble them up. Honestly, they rarely last that long around here!
Nutritional Information for Red Velvet Cookies
Just a heads-up, the numbers below are an *estimate* per cookie, since everyone’s ingredients and brands can be a little different. But it gives you a good ballpark!
Serving Size: 1 cookie
Calories: 250
Fat: 12g
Saturated Fat: 7g
Trans Fat: 0g
Carbohydrates: 35g
Sugar: 25g
Fiber: 1g
Protein: 2g
Cholesterol: 35mg
Sodium: 100mg
Share Your Red Velvet Cookie Creations!
Have you tasted these amazing Red Velvet Cookies yet? I would just LOVE to hear all about it! Did they turn out perfectly chewy? Was the frosting just right? Let me know in the comments below how yours turned out, or even better, share a picture on social media and tag me! Your creations make my day!
Print
Red Velvet Cookies
- Total Time: 30 min
- Yield: 24 cookies 1x
- Diet: Vegetarian
Description
Classic red velvet cookies with a cream cheese frosting.
Ingredients
- 2 1/4 cups all-purpose flour
- 1 teaspoon baking soda
- 1/2 teaspoon salt
- 1/2 cup (1 stick) unsalted butter, softened
- 1 cup granulated sugar
- 1 large egg
- 1 teaspoon vanilla extract
- 1 tablespoon unsweetened cocoa powder
- 1 ounce unsweetened chocolate, melted
- 1/4 cup buttermilk
- 1–2 drops red food coloring
- For the Cream Cheese Frosting:
- 4 ounces cream cheese, softened
- 1/4 cup (1/2 stick) unsalted butter, softened
- 1 teaspoon vanilla extract
- 2 cups powdered sugar
Instructions
- Preheat your oven to 350°F (175°C). Line baking sheets with parchment paper.
- In a medium bowl, whisk together the flour, baking soda, and salt.
- In a large bowl, cream together the softened butter and granulated sugar until light and fluffy.
- Beat in the egg and vanilla extract.
- In a small bowl, combine the cocoa powder and melted chocolate. Stir in the buttermilk, red food coloring, and the chocolate mixture.
- Gradually add the dry ingredients to the wet ingredients, mixing until just combined.
- Drop rounded tablespoons of dough onto the prepared baking sheets, about 2 inches apart.
- Bake for 9-11 minutes, or until the edges are set and the centers are still slightly soft.
- Let the cookies cool on the baking sheets for a few minutes before transferring them to a wire rack to cool completely.
- For the frosting: Beat together the cream cheese and butter until smooth.
- Stir in the vanilla extract. Gradually add the powdered sugar, beating until combined and smooth.
- Once the cookies are completely cool, frost them with the cream cheese frosting.
Notes
- For a richer flavor, you can use dark unsweetened chocolate.
- If you don’t have buttermilk, you can make a substitute by mixing 1/4 cup of milk with 1/2 teaspoon of white vinegar or lemon juice and letting it sit for 5 minutes.
- Store frosted cookies in an airtight container in the refrigerator.
- Prep Time: 20 min
- Cook Time: 10 min
- Category: Dessert
- Method: Baking
- Cuisine: American
Nutrition
- Serving Size: 1 cookie
- Calories: 250
- Sugar: 25g
- Sodium: 100mg
- Fat: 12g
- Saturated Fat: 7g
- Unsaturated Fat: 5g
- Trans Fat: 0g
- Carbohydrates: 35g
- Fiber: 1g
- Protein: 2g
- Cholesterol: 35mg
Keywords: red velvet cookies, chocolate cookies, cream cheese frosting, holiday cookies, dessert recipe

