There’s something undeniably comforting about a slice of vanilla cake — simple, nostalgic, and sweet. But when you fill that soft, buttery vanilla cake with rich, gooey chocolate? That’s when the magic really happens. This Vanilla Cake Filled with Chocolate is the perfect fusion of classic and indulgent, creating a dessert that feels both familiar and thrilling. And before we dive into the full recipe, let me just say—thank you for being here! Whether you’re a longtime reader or just stumbled upon this recipe while craving something sweet, I’m so grateful you’re joining me in the kitchen today.
If you’d love to get more cozy, crowd-pleasing recipes like this delivered straight to your inbox, don’t forget to subscribe to my email list! You’ll be the first to get new recipes, seasonal favorites, and baking tips you won’t want to miss.
What Is Vanilla Cake Filled with Chocolate?
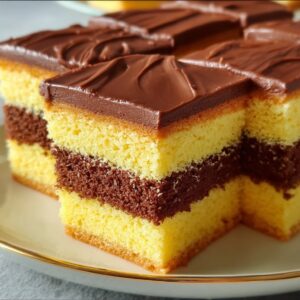
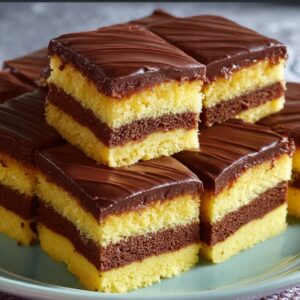
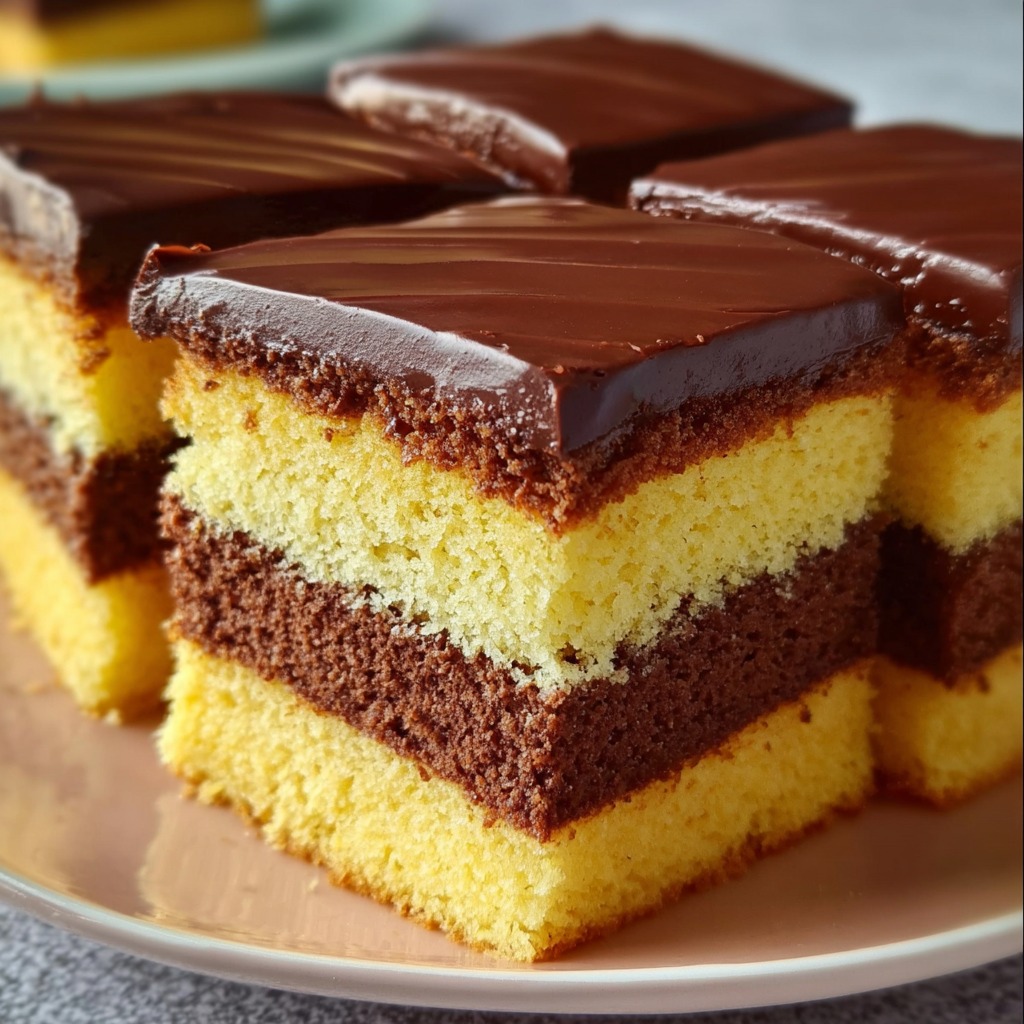
This cake brings together two dessert staples—classic vanilla and rich chocolate—in one irresistible treat. At first glance, it looks like your typical vanilla layer cake, but slice it open and you’ll find a luscious surprise: a velvety chocolate filling nestled between the layers or oozing from the center if baked as a filled bundt. It’s a cake that gives you the best of both worlds.
Whether you’re baking for a birthday, a holiday, or a simple weekend treat, this vanilla cake with chocolate filling is bound to impress. The vanilla flavor is soft, buttery, and delicately sweet, while the chocolate provides a rich, decadent contrast. It’s essentially a dessert hug—warm, indulgent, and exactly what you need when only cake will do.
Reasons to Love This Vanilla Cake with Chocolate Filling
Let me count the ways, because I truly could go on and on!
Perfect for all occasions: Birthdays, anniversaries, dinner parties—or just a Wednesday night that needs a little sparkle.
Versatile and customizable: Add berries, nuts, or espresso powder to make it your own.
Foolproof results: The batter is forgiving and comes together easily.
That surprise filling!! It’s not just delicious; it’s exciting to serve.
Make-ahead friendly: You can prepare the cake and filling ahead of time and assemble later.
I promised you versatile, and here’s proof!
What Does It Taste Like?

This cake is a dream come true for dessert lovers. The vanilla sponge is light yet moist, with that tender crumb we all chase after in homemade cakes. It’s buttery and fragrant, with subtle hints of warm vanilla throughout. And the chocolate filling? Oh my goodness—it’s everything. Think smooth, melt-in-your-mouth ganache or fudgy pudding, depending on how you decide to make it. The combination of the two is indulgent, balanced, and anything but boring!!
Why You’ll Love Baking This Recipe
If you’ve ever been intimidated by layer cakes or filled cakes, this is a great place to start. This recipe is straightforward, uses pantry-friendly ingredients, and is super forgiving. Plus, that chocolate surprise inside really turns up the wow factor with minimal effort.
Here’s what else makes it amazing:
Great for beginner bakers – No fancy techniques required.
Crowd-pleaser – It disappears fast at any gathering.
Can be made gluten-free or dairy-free – Just a few simple swaps.
Ideal for decorating – You can keep it rustic or go full showstopper!
Ingredients You’ll Need
For the vanilla cake:
2 ½ cups all-purpose flour
2 ½ tsp baking powder
½ tsp baking soda
½ tsp salt
¾ cup unsalted butter, softened
1 ¾ cups granulated sugar
4 large eggs, room temperature
1 tbsp pure vanilla extract
1 cup buttermilk
For the chocolate filling:
¾ cup heavy cream
1 ½ cups semisweet chocolate chips or chopped chocolate
1 tsp vanilla extract
Pinch of salt
Optional (for serving or decorating):
Whipped cream
Chocolate shavings
Fresh berries
Powdered sugar
Tools You’ll Need
Stand or hand mixer
Mixing bowls
Measuring cups and spoons
2 round cake pans or one bundt pan
Offset spatula (for frosting or layering)
Cooling rack
Small saucepan (for making the chocolate filling)
Ingredient Swaps and Additions
Want to tweak it? Go for it! Here are some fun variations:
Dairy-free: Use plant-based butter and coconut milk for the ganache.
Espresso swirl: Add 1 tsp instant espresso to the chocolate for a mocha twist.
Fruit layer: Spread raspberry or cherry jam with the chocolate filling.
Nut crunch: Sprinkle chopped hazelnuts or almonds into the center.
Gluten-free: Substitute a 1:1 gluten-free baking flour.
How to Make Vanilla Cake Filled with Chocolate
Step 1: Make the Chocolate Filling

In a small saucepan, heat the cream until just simmering. Pour over the chocolate chips in a heatproof bowl. Let sit for 2 minutes, then stir until smooth and glossy. Stir in vanilla and a pinch of salt. Let cool until thickened to a spreadable consistency (about 30 minutes in the fridge or 15 at room temp).
Step 2: Preheat and Prep
Preheat your oven to 350°F (175°C). Grease and flour your cake pans or line them with parchment paper.
Step 3: Mix the Dry Ingredients
In a medium bowl, whisk together the flour, baking powder, baking soda, and salt. Set aside.
Step 4: Cream the Butter and Sugar
In a large bowl, cream together the butter and sugar until light and fluffy (about 3-4 minutes). Beat in the eggs one at a time, then stir in the vanilla.
Step 5: Combine the Wet and Dry
Add the dry ingredients to the butter mixture in three parts, alternating with the buttermilk. Mix just until combined—don’t overmix.
Step 6: Bake the Cakes
Divide the batter evenly between your pans and bake for 25-30 minutes, or until a toothpick inserted in the center comes out clean. Cool completely before filling.
Step 7: Assemble the Cake
Place one cake layer on your serving plate. Spread the chocolate filling evenly over the top. Add the second layer and decorate as you like—with frosting, whipped cream, or a dusting of powdered sugar.
Step 8: Chill and Serve
Let the cake chill for 30 minutes before slicing if the filling is soft. Then slice and enjoy that moment of chocolatey surprise!
What to Serve with This Cake
This cake is a showstopper on its own, but if you’re feeling fancy, pair it with:
A scoop of vanilla bean or chocolate ice cream
Fresh strawberries or raspberries
A dollop of whipped cream
A drizzle of warm chocolate or caramel sauce
Tips for Success
Use room temperature ingredients for better mixing and texture.
Don’t overbake! Keep an eye on your cake to avoid drying it out.
Let the chocolate cool to a thick, spreadable consistency before layering.
Level your cakes with a serrated knife if you want a flat top.
Decorate simply or go wild—it’s up to you!
How to Store
Keep any leftovers in an airtight container at room temperature for up to 2 days or in the fridge for up to 5 days. You can also freeze the cake (unfilled) for up to 2 months—wrap tightly in plastic wrap and foil.
Frequently Asked Questions
Can I make this cake ahead of time?
Absolutely! You can bake the cake layers and prepare the chocolate filling up to two days in advance. Assemble the day you plan to serve.
What kind of chocolate should I use?
Semisweet or bittersweet chocolate works best. You can use chips or chopped bars—just make sure it’s high-quality for the best flavor.
Can I use this recipe for cupcakes?
Yes! Just divide the batter into cupcake liners and reduce the baking time to 18–20 minutes. You can pipe the chocolate filling into the center after baking.
Is the filling more like ganache or pudding?
This version is closer to a soft ganache, but you can swap it for pudding if you prefer a creamier texture.
In Conclusion
This Vanilla Cake Filled with Chocolate is more than just a dessert—it’s an experience. From the moment you cut into it and reveal that hidden chocolate layer to the very last bite, it’s pure joy on a plate. It’s simple enough for weeknight baking yet impressive enough for celebrations, and I hope it finds a happy place in your recipe box.
If you loved this one, you might also enjoy these peach-inspired bakes:
Peaches and Cream Layer Cake
Brown Sugar Peach Muffins
Did you try this recipe? I’d LOVE to hear about it! Leave a comment below or share your photos on Pinterest—tag me so I can see your beautiful creations!
Nutritional Information (Per Slice – Approximate)
Calories: 420
Fat: 22g
Saturated Fat: 12g
Carbohydrates: 52g
Sugar: 36g
Protein: 5g
Fiber: 2g
Sodium: 260mg
Happy baking, my friend!

